How To Add Data Disk In Azure Virtual Machine
Login
into Azure Portal Azure Portal
Once logged in, select virtual machine to add new data disk. In my case I have
selected Virtual Machine named “StoragePool”.
After selecting virtual machine, you will able to see “Overview”.
We have to click on “Disk”
tab as show in below screenshot. You will see currently we don’t have any disk associated with selected virtual machine. To add new data disk, we have to
click on “+ Add data disk”
Default it will start with LUN 0. From drop down, we have
to select “Create Disk”, as show
below.
You will redirect to disk create wizard and below page will
appear.
Fill in all mandatory information. Once all the
information is populated you can click on “Create” button below.
Note: You
can use your existing “Resource Group”
or you can create new one. In my case, I am using my existing resource group “myIT”. For demonstration, I have given
100 GB, you can give as per you requirement.
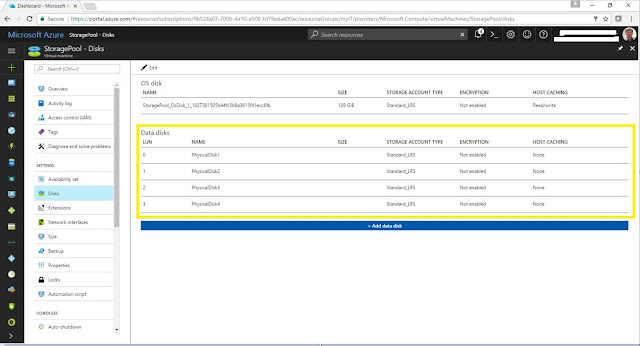
Post completion of disk creation wizard, you will see new
data disk got created with given name. Below is the reference screenshot.
By using above given method, I have created remaining
PhysicalDisk2, PhysicalDisk3 and PhysicalDisk4.
Hope this article is helpful!!!
Please comment and feedback for improvement in
future articles!!!
Thank YOU..!


Comments
Post a Comment